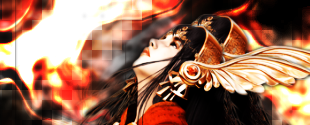
Not my favorite outcome... but this is how I make most of my tag backgrounds. A few requested this from me.
si.MOTION GLOW TAG TUTORIALBy Smangii of SI.GFXRip and You will be punished >_>
ONE. Create a new image, size approximately 300-350 x 100-150 are best. Any tag size will do, tho. Using the flood-fill tool, fill the background #000000 or Black.
TWO. Go to Layers --> new Raster Layer --> Ok. Set your foreground color to #FFFFFF or White. Then click "B" on your keyboard, or the brush tool in your toolbar. Use any textured brush and splatter your background randomly. Not too much, though.
 THREE
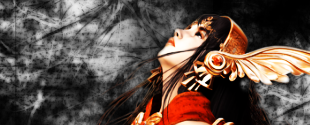
THREE. Go to Layers --> new Raster Layer --> Ok. This layer will be the one for your render. Add your render, and feather it to about 12. Invert, delete, and walla. A blended image.
 FOUR
FOUR. Duplicate this Layer (Right click --> Duplicate) and set the blend mode to Hard Light. Right click on the layer in the Layers Palette, and go to Merge --> Down.
 FIVE
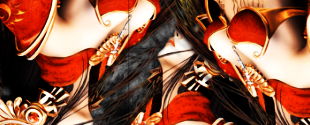
FIVE. Duplicate this merged layer again, and go to Image --> Mirror and Image --> Flip. Position it the way you like, imagining if it were the background colors (which they will turn into be... so this is important. Try to work with "flow" here). After finding a good position, do anothere one by duplicating the layer again, and mirror/flipping it around. Position it again.
 SIX
SIX. Merge these two layers together by right clicking on the top layer and going to Merge --> Down. In the layers palette, click and drag it beneath your original render/layer. Duplicate this merged layer again, and hide one of the duplicates. We will use this hidden one later!
 SEVEN
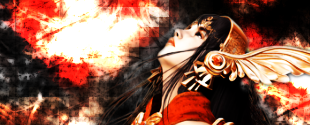
SEVEN. We'll now work with the un-hidden layer. Set the blend mode of this layer to Dodge. Then, go to Adjust --> Blur --> Motion Blur. Set the strength to about 50 or 60, and the angle should be facing toward your render/image. Press OK.
 EIGHT
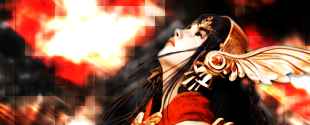
EIGHT. Now we return to that hidden layer! In the layers palette, click and drag it above the motion-blurred layer. Un-hide it (Make it visible) and go to Effects --> Disortion Effects --> Pixelate. Click the "symmetry" button and set the width to 10 pixels. Click OK. Go back to the layers Palette, and set the blend mode of this current layer to Overlay with an opacity of about 70 - 80%. Click OK.
 NINE
NINE. Hmm, looks a bit grunge-like, no? We're about to smoothen it out. Return to your second layer, the one with the white brushes you added before. Go to Adjust --> Blur --> Gaussian Blur and set the radius to 2.
 TEN
TEN. Much better, no? Now let's add some funky motion! Click once on the layer that you motion-blurred. Then in your toolbar, select the "Warp Brush". Make sure the first icon, called "Push" is selected. A good size to work with is 30, but feel free to go smaller or larger depeding on the effects you want. My hardness is on 10, strength up to 100.
ELEVEN. Start moving areas around with this brush, making lights flow around the sig as you stretch the dark and light around. Have fun with it, keep in mind "flow" =)
 TWELVE
. Once you've got something you like, Go back to the layer with your original render. Duplicate it, and using the Move Tool move the duplicate just under and over to the left or right of the original.
 THIRTEEN
. Once done, then go to Effects --> Disortion Effects --> Pixelate, to about 5 or 6 pixels. Return to the layers palette, and set the blend mode to Overlay, with an opacity of about 70%.
 FOURTEEN
. Woo..almost done! Go to layers --> merge --> All. Then go to Adjust --> Smart Photo Fix. Here is where I make some last-minute changes. I advise on a sig like this, to lower the shadows a bit, and raise the highlights. Make the saturation a teensy bit more colorful, and the focus a teensy bit more sharper. Test this tool out, it comes in great handy =D Whatever you like best! Once finished, click Ok and...
YOU'RE DONE!
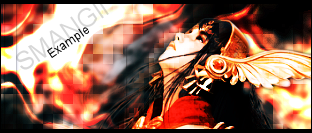
Of course you can add text, something simple is the best way to go with a sig like this. Arial at size 10 or 12 works for me =)
FINAL RESULT:
 I hope you enjoyed this tutorial, brought to you by SI.GFX
 =D


 (I probably could convert it to a PS version, but still.)
 If you can convert it, please do... many have requested the same thing >_> tis a shame I have no idea how to use, let alone navigate PS... yet I do own it.