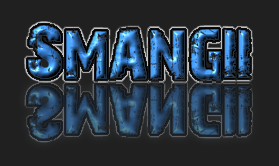
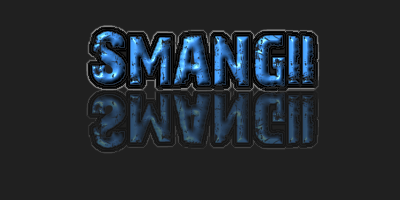
WElcome to the tutorial on how to make an easy 3-D text reflection! The final result looks like this:
STEP ONE: Open a new transparent image, and fill your background color. I'm using #202020
Go to layers --> new raster layer --> Ok
STEP TWO: Select your text/font. I'm using a font called 28 Days, size 72, with #3f8ce5 as my background color. Have anti-alias marked as SMOOTH. Also, create it as FLOATING.
STEP THREE: Type in your text. I'm going to use Smangii for this demo. Position it the way you want so u have room for the reflection.

DO NOT DESELECT!!
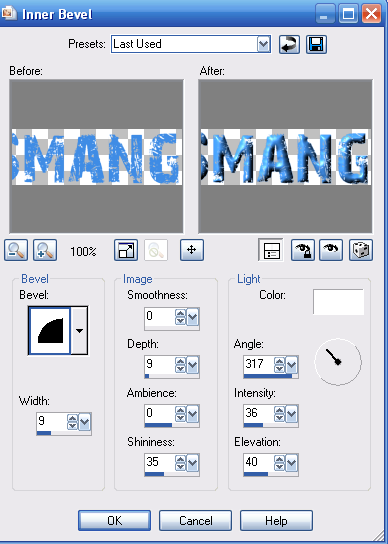
STEP FOUR: Now we're going to add that 3-D look. Go to Effects --> 3D Effects --> Inner Bevel
Have your settings looks like these:
Click OK.
STEP FIVE: DO NOT DESELECT!! Go to Selections --> Modify --> Expand. Set the pixels to 2 and click ok. Now, set your foreground color to Black, or #000000
STEP SIX: Zoom in on your text, and using the FLOODFILL tool (or press the F key on your keyboard) Fill in the outer layer of your ttext.
ZOOMED IN:
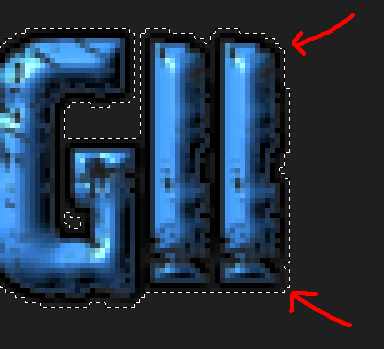
ZOOMED OUT:

STEP SEVEN: Once all the letters are complete, go to Selections --> Modify --> Expand. Set your pixels to 2 again. Fill your background color with a light gray, or #808080. Once again using the flood fill tool, fill in the outerlayer of your text.

STEP EIGHT: With your text still selected, Press CTRL + C on your keyboard, or go to Edit --> Copy
Go to layers --> new Raster layer --> OK
STEP NINE: Press CTRL + E on your keyboard, or go to Edit --> Paste as selection.
You should have gotten a duplicate image. Position it under your original text, almost exactly aligned.

STEP TEN: Go to selections --> Select none.
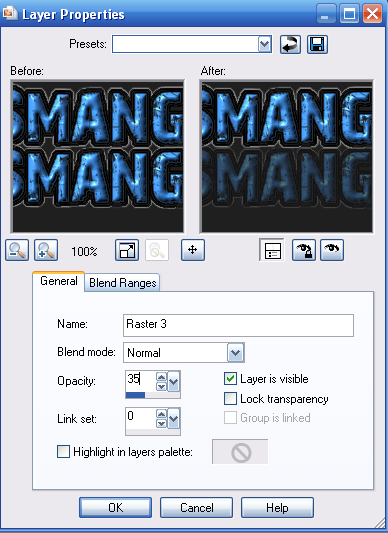
STEP ELEVEN: In the Layers Palette, double click on Raster 3. Change the opacity to 35 under General Properties:
CLick OK.
STEP TWELVE: Press CTRL + I on your keyboard. This should flip your image and invert it. Use the MOVE tool (press M on your keyboard) to move the reflection under your image.
STEP THIRTEEN: In your layers palette, right click on Raster 3 and click 'Duplicate'. A new layer called "copy of raster 3" should appear.
STEP FOURTEEN: With that "Copy of Raster 3" selected, go to Adjust --> Blur --> Gaussian Blur and set your radius to 8.
STEP FIFTEEN: Back in the layers palette, click on Raster 3 and drag it upward above the "Copy of Raster 3"
TA DA!! You're done! This should be something like your final result ^^

I HOPE YOU ENJOYED!
